Pickling vegetables is a rewarding culinary skill that preserves flavor and adds zest to your meals. Whether you’re a novice or seasoned cook, you’ll find joy in transforming fresh produce into tangy, crunchy delights that enhance your dishes. This guide will provide you with clear steps and useful tips to master the art of pickling, allowing you to explore a variety of flavors, textures, and creative possibilities in your kitchen.
The Essentials of Pickling: Ingredients and Equipment
Pickling transforms fresh vegetables into tangy, flavorful delights. The right ingredients and equipment set the stage for a perfect pickling experience. Let’s dive into selecting vegetables, assembling basic brine components, and the essential tools to enhance your pickling process.
Selecting Vegetables
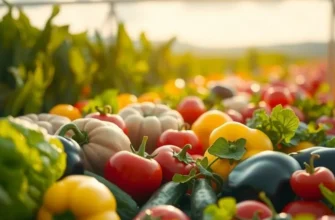
Start with garden-fresh, firm vegetables. Cucumbers, carrots, cauliflower, and green beans are excellent. Opt for vegetables that are crisp, as they retain firmness during the pickling process. Avoid overly large or overripe vegetables, which may become mushy. If your produce looks less than ideal, consult a guide on waste reduction to make the most of your ingredients.
Basic Brine Ingredients
A standard brine consists of four basic ingredients: water, vinegar, salt, and sugar. Use distilled water to prevent unwanted flavors. White vinegar is versatile and ensures clear, vibrant pickles. Add pickling salt, which dissolves quickly and leaves no trace of additives or cloudiness. A touch of sugar rounds out the acidity.
Feel free to personalize your brine. Adding spices like dill, mustard seeds, or garlic can elevate flavors. Customize your concoction to suit personal tastes. Remember, the strength of your vinegar determines the tartness; balance it for your desired bite.
Essential Equipment
Equipping your kitchen with the right tools is crucial for a smooth pickling session. Start with a large pot for boiling. Ensure it comfortably fits jars, allowing for smooth water-bath canning if long-term preservation is desired.
You’ll need glass canning jars with lids and bands. Choose durable, heat-resistant jars in sizes that fit your needs. Wide-mouth jars allow easier packing of vegetables.
A jar lifter prevents burns when handling hot jars. A wide funnel eases the filling of jars without mess, while a bubble remover/headspace tool eliminates trapped air bubbles and measures liquid headspace accurately.
A digital timer helps monitor boiling times accurately. Consistency ensures that every jar processes correctly, reduces spoilage risk, and boosts flavor retention.
Enhancing Your Workshop
Consider investing in a mandoline slicer to achieve uniform vegetable slices. Consistency in thickness allows for even pickling and a visually appealing final product.
For those without space for a large pot, a compact pressure cooker can be an alternative. It compresses time without compromising quality. Once proficient, explore experimenting with fermentation as another preservation method, expanding your culinary repertoire.
By gathering these ingredients and tools, you’re poised for a successful venture into home pickling. Embrace the creativity and control homemade pickling offers, ensuring each jar captures the peak of your garden’s harvest.
Step-by-Step Guide to Pickling Vegetables
Pickling is both an art and a science, transforming humble vegetables into beloved crunchy treats. Here is your comprehensive guide to mastering this ancient preservation method.
Preparation of Vegetables
Begin by selecting the freshest vegetables. Wash them thoroughly in cold water, scrubbing off any dirt or residue. Depending on the type, you might want to peel, slice, or chop the vegetables to ensure even pickling. Trim ends and remove any blemishes. For those experimenting with just-off-the-vine freshness, consider slicing cucumbers into spears or chopping carrots into matchsticks.
Creating the Brine
A key component of pickling is the brine, which serves as the infusion medium for flavors while ensuring preservation. Traditionally, a basic brine includes equal parts water and vinegar, with the addition of salt and sugar. Use 5% acidity vinegar for optimum preservation. Here’s a simple brine recipe: for every cup of water, add a cup of white vinegar, a tablespoon of salt, and a tablespoon of sugar. Adjust these levels to taste, ensuring the sodium and acidity levels remain high for safety.
Flavor Variations
Customize your brine with spices and herbs to create personalized flavor profiles. Consider dill, garlic, mustard seeds, or chili flakes for a zesty kick. For a sweeter touch, add a few cloves or cinnamon sticks. Layering these flavor elements between pieces of vegetables in your jars can distribute the taste evenly. If you are mindful of salt intake and seeking alternatives, explore flavor boosters without salt for additional ideas.
Filling the Jars
Sterilize your jars and lids by boiling them to prevent bacterial contamination. Once dry, carefully pack vegetables into the jars, leaving at least half an inch of headspace. Pour the hot brine over the vegetables, ensuring they are completely submerged while maintaining the headroom. Release any trapped air bubbles by gently tapping the jar or using a knife to stir.
Sealing and Storing
Secure the lids firmly on the jars. If using the hot water bath method for long-term storage, process jars in boiling water for 10 to 15 minutes. This technique is not only great for preservation but also impacts the texture and taste positively. Once processed, let the jars cool at room temperature before transferring them to a cool, dark place for storage.
Storage Methods
Unprocessed pickles should be stored in the refrigerator and consumed within a month to ensure freshness and crunch. For long-term storage, ensure your processed jars have sealed correctly—lids should not pop when pressed in the center. Properly sealed jars can be kept at room temperature for up to a year, allowing the pickles to continue developing flavor.
By following these detailed steps and experimenting with flavors, you’ll be on your way to creating delicious home-pickled vegetables catering to your own taste preferences. Remember, practice and creativity will pave the path to your personal pickling perfection!
Final words
Pickling vegetables is a fulfilling process that not only preserves the beauty of fresh produce but also adds a delightful crunch and vibrant flavor to your meals. By mastering the essentials and following a structured approach, you’ll soon enjoy jars filled with homemade pickles ready to be savored. Remember, the joy of pickling lies in experimentation—don’t hesitate to try different vegetables, herbs, and spices. So go forth, embrace your creativity, and infuse your dishes with the delightful tastes of your very own pickled creations.

